To set up ProtonMail, you will need to have your registered domain name, and a ProtonMail account. ProtonMail's Getting Started guide may be helpful.
ProtonMail's free account plan does not support email addresses with your own domain name, so you will have to select a paid plan. The Plus plan supports one domain name. (But you can make multiple email addresses with it.)
Once your ProtonMail account is set up, you don't need to manually add all of their DNS records in your iwantmyname dashboard, but you will have to copy their verification code to add to our install.
If you scroll down to the Verify section on this page, that will explain what the verification code looks like and where to access it. Once you have it, login to your iwantmyname account Go to the domain dashboard page of the domain you want to set up and click on manage DNS records.
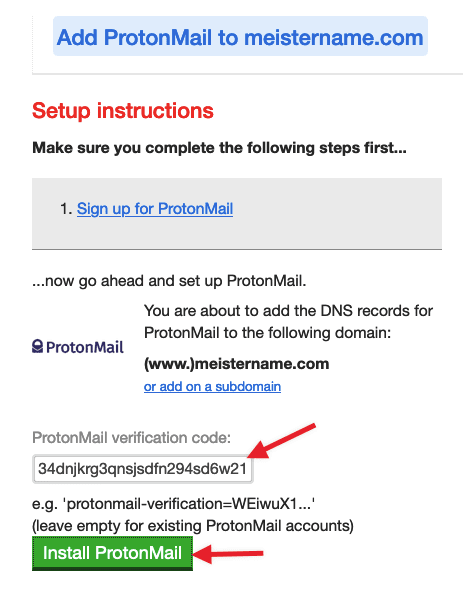
Type ProtonMail into the dashboard search field, then press the Enter key to bring up the ProtonMail install page in our Marketplace.
Paste in the ProtonMail verification code, then click the Install ProtonMail button to complete the setup. You will see a Finished! message as confirmation, and if you go to the dashboard, you will see ProtonMail's DNS records.
Go back to your ProtonMail account, and in the Control Panel under Settings section, then Domains, and click on the Verification button. If verification does not work just yet, wait another hour or two. DNS record propagation is not instantaneous and it may just need a bit more time.
Once that's completed, you're all set! You can do any other email account setup in your ProtonMail account, such as adding additional email addresses, setting up forwarding to another account or client, etc. The setup in your iwantmyname account is all done.

