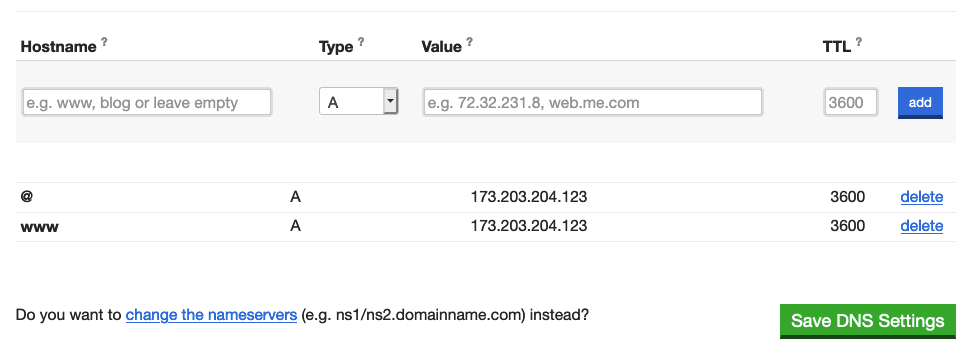
When you are logged in to your account, go to the domain dashboard for which you want to add the record. Click manage DNS records.
In the Hostname field, if you are setting up the record for the root domain, e.g. mydomain.com, you can leave it blank. It's usually left blank, and once the record is saved the field will show @.
If you are setting up the record for a subdomain, e.g. blog.mydomain.com, then you would enter "blog" in that field.
Choose A from the Type drop-down menu.
Enter the A Value, which must be an IP address, e.g. 162.118.144.2.
It is possible to use the same IP address for two A records, e.g. one for the root domain and one for www. (See example below.)
Leave the TTL field as is at 3600. Click the blue add button to add the MX record to the domain's zone. It will appear in the list of DNS records for your domain. Click the green Save DNS Settings button to save the new settings.
